Sometimes it's fun to be trendy... run with the IN crowd. Just be sure to put down your craft scissors before you run. ;)
This card is the "cat's meow," and has some of the latest craft trends all over it! I started with the idea of wanting to make a card using blues and purples. Then I thought giving it sort of an ombre look would be great. And you can't leave out chevrons or flags. Throw in some Baker's Twine and a good amount of white space, and you've got yourself one of the hippest cards in town!
I used the Tasteful Trim Bigz XL die to cut scraps of (from top to bottom) Wisteria Wonder, Elegant Eggplant, Perfect Plum, Baja Breeze, Island Indigo, and Pool Party card stock. Wisteria Wonder Baker's Twine tied into a bow around the 1-1/4 x 2-1/2" Pool Party DSP looks pretty darn cute.
What? What stamp? Oh! You want to know where I got that neat-o greeting that's stamped in Elegant Eggplant? Um, yeah. That's from an awesome (and very trendy!) Hostess stamp set in the upcoming catalog. That's right, Banner Greetings is a Hostess stamp set. Why? Because we know that you want to be like all the other super-cool people and host your own stampin' party so you can get cute, trendy, free stuff too! C'mon... you know you want too... ;)
Showing posts with label Whisper White. Show all posts
Sunday, May 5, 2013
Thursday, May 2, 2013
sketch happy... again
Two posts in one day???! Whoa, my little speck of the craft world has turned upside down! But I found a nifty sketch, and it was one of the cards I made yesterday, and I really want to share it, and I have so much stuff to share next week, and the weekend is coming so you might want an idea for an easy card... ;)
There you go - my take on Retro Sketch #61. I stamped my greeting from the Trust God stamp set in Crisp Cantaloupe (ah yes, a new In Color, yay!) onto the 3-1/2 x 4-3/4" layer of Whisper White card stock.
After tying Wisteria Wonder Baker's Twine around the 1-1/2 x 4" strip of Patio Party DSP twice, I attached the DSP layer with Dimensionals. Two punched hearts were the only embellishment I needed to finish up this simple card. So, what do you think?
Labels:
Baja Breeze,
Crisp Cantaloupe,
DSP,
punch,
Whisper White
Tuesday, April 30, 2013
sweet mojo
Here's a little insight into my floopy thought process... When I saw this week's Mojo Monday sketch, I thought, "aww, what a sweet card that would make! Sweet, sweet, something sweet... chocolate, chocolate covered cherries (no clue as to why I thought of those), oh hey - the cherries will be ready to pick in a few months... cherries! I have a cherry stamp!" Can't image where my son gets the ADD from... SQUIRREL!
And so here we are. :}
It is a pretty sweet card, isn't it?! The Riding Hood Red card base measures 4-1/4" square (closed). Can you believe I ended up raiding three DSPs (Twitterpated, Summer Smooches, Regals Stack) for those little strips? *** Tip: I doubled up the Lucky Limeade Baker's Twine before tying it around the 4" square Lucky Limeade card stock so that my bow would stand out more - cute!!
I used Lucky Limeade and Riding Hood Red Markers to ink the cherry stamp (Button Buddies), which I die cut using a Labels Collection Framelit. Two Riding Hood Red buttons (from my vault, of course) are adhered over the fruit with Mini Glue Dots - mega cute!! For my greeting, I used a Basic Black Marker to ink the words on a stamp in the Storybook Friends stamp set. Happy, happy, happy :}
I think pretty much everything I used, except the stamp for my greeting and the Framelit, is retiring. Remember, retiring accessories (DSP, embellishments, ribbon, stamp wheels, card stock) are available only while supplies last. You can shop for your favorites here, before they are all gone. Oh, and several goodies are on sale! Have a SWEET day!!
Labels:
DSP,
Framelits,
Lucky Limeade,
MOJO,
Ribbon,
Riding Hood Red,
Whisper White
Monday, April 29, 2013
what to do with all these embellishments?
When it's time for accessories to retire, I start looking at my stash of embellishments and think of all the ways I can use them up.
How about using a whole bunch on one card??? All these brads were perfect for a birthday card - they remind me of candy dots or bits of confetti.
After stamping my greeting (Sassy Salutations) in Marina Mist ink onto a 4-1/2 x 3" layer of Whisper White card stock, I used the Paper-Piercing Tool and the Essentials Paper-Piercing Pack to create two parallel rows of holes so my brads would be aligned. That layer is then attached with Dimensionals to a Notecard.
So what do you think? Any other ideas for me to use up my stash? :}
Thursday, April 25, 2013
the return of Soft Sky
It will be a few days before I get my goodies from the "new Cattie pre-order," but I'm too darn excited about some of the colors that are retuning. Sooooo, I got into my vault (aka "paper-crafting stuff I'm hoarding"). I pulled some Soft Sky card stock, retired ribbon, and retired DSP from my vault, and paired them with this week's Mojo Monday sketch to create this pretty card-
I might be getting a little obsessed with the Papillon Potpourri stamp set, but it's so pretty, and has punches that coordinate! Technically it's Groovy Guava in that retired DSP, but I think it works nicely with Calypso Coral on this card. I'm so happy Calypso Coral is moving into our "core" colors!
To add a subtle look of four "boxes," I added score lines an inch apart on the Whisper White card stock. **Tip: Before adhering punched butterflies (or flowers) to your project, curl the edges up slightly to add more interest.
So how do you start playing with these fun new colors like Soft Sky if you don't have a vault of retired goodies??? All you need is a good color combination! Here's what Soft Sky looks like when paired with Pumpkin Pie and Wild Wasabi-
Love this color combo!! I see a lot of "boy" cards in my crafting future using these colors.
FYI - those Pumpkin Pie brads are on the "chopping block." The retiring accessories are available only while supplies last, so be sure to shop now before all the good stuff is gone! ;)
Wednesday, April 17, 2013
Thanks a Million
Well, after yesterday's post, it's time for something a little more normal. ;)
How about a simple "thank you" card? I love surprising people with a random act of kindness, and the teachers at the boys' school were due for a treat. I've said it before, but I'll say it again, I am so blessed that my boys attend one of the best schools around. The staff is fabulous! So I took in a pretty "thank you" card and left it in the teacher's lounge with some yummy goodness. Inside I wrote a message about sharing something from our old home with our new home. :}
The Summer Smooches DSP and Bright Blossoms stamp set are so cute together. I chose my greeting from the Word Play stamp set to compliment my crisp, clean design.
Isn't that Printed Brad through the Button cute? Somewhere... somewhere, in my craft stash are some craft pliers, but since I couldn't find them, I borrowed the manly garage pliers and squeezed the "legs" of the brad to a narrower width so I could thread them into the button holes. I simply poked two holes into the card stock for the brad "legs" to go through.
For all of the teachers who read through my fabulous and amazing blog posts (wink, wink)... wouldn't you love to find this waiting for you in the teacher's lounge on a Monday morning? I loved the reaction from one of the teachers who said she'd never heard of Kringle, because neither had I until we moved to Wisconsin thirteen years ago. Now, after moving again, I know my tastebuds will miss it (not my waistline!).
I might just have to plan a visit with some friends soon... I'm getting hungry. ;)
Labels:
card,
family,
Island Indigo,
Lucky Limeade,
Summer Smooches,
Tangerine Tango,
Whisper White
Monday, April 15, 2013
from YUCK to WOW - the evolution of a card sketch
Today has been very productive - yay! Got some laundry done and my grocery shopping finished. (One thing that frustrates me with our new location - having to go to 2 grocery stores to get the things we need, and even then, doing without several things I was used to getting in a larger community.) Then, I had some crafting time with my sister-in-law - double yay!! She worked on birthday party decorations for my sweet little niece, and I worked on cards.
To get me going, I started with the Mojo Monday sketch 289. Right away I knew it was going to be a challenge for me... it's kind of a "busy" sketch. I'm going to share the first card I made from the sketch, just so you know that I don't love everything I make. In fact, when I finished, I said "this might be one of the ugliest cards I ever made!" My sis-in-law is so sweet and tried to say nice things like, "well, it's bright... maybe it's just the paper." Ummm, yeah...
The idea I had in my head did not translate well into card stock and paper. :( As a joke, my sis-in-law is sooooo getting this in the mail on some random day! I think the message inside will say something along the lines of "I made this just for you to show you how much I care..."
One thing I think turned out well was using two colors for the brad trios. I'll have to remember that for later.
I wasn't going to let this sketch beat me, and I had another triangle of Summer Smooches DSP left, so I started over and made a pretty awesome card, that I am quite pleased with! :}
Love, love, LOVE, LOVE this color combo- Lucky Limeade, Whisper White, and Rich Razzleberry. It's so striking together! I eliminated the square from the sketch and let the bow from the Lucky Limeade Baker's Twine stand in for the small flower... aaaahh - much better.
I used one of the Single Stamps for the focal point - the Basic Label stamp fits perfectly in one of the Apothecary Accents Framelits. Then, using the Stamp-a-ma-Jig, I stamped my sentiment (Forever with You) to the left of center, leaving room for the tiny DSP strip and flower to overlap.
Isn't that flower pretty??? I made it by punching out 7 scallop circles from Rich Razzleberry card stock, which are held together with a brad (can you believe there are 9 brads on this card???). Starting with the top layer, I spritzed some water, and scrunched it up around the brad. I repeated the process, working my way down through the layers one at a time.
Looking at the finished card, I think it's one of the prettiest cards I ever made. So have you ever experienced a YUCK card - something that turned out completely different from your idea? Were you able to fix it? I'd love to hear your story! :)
Labels:
DSP,
Framelits,
Lucky Limeade,
punch,
Rich Razzleberry,
Summer Smooches,
Whisper White
Friday, April 12, 2013
clean and simple - part 2
While I had the Notecards out and was stamping quick and easy cards, I went ahead and stamped a few other designs, including this card inspired by the Clean & Simple sketch #235:
Isn't that just darling?? And it was super easy to make!
I inked the vase image (Button Buddies) using Island Indigo and Lucky Limeade markers. Then I adhered the image and a small strip of Tea for Two DSP to a layer of So Saffron card stock. After stamping my greeting (Teeny Tiny Wishes) in Lucky Limeade ink onto Certainly Celery card stock, I folded that strip under, tied on some Lucky Limeade Baker's Twine, and attached the whole piece to a pre-cut, pre-scored Notecard (love these things!). For the final step, I attached some Buttons - easy peasy!
Labels:
Certainly Celery,
DSP,
Notecard,
So Saffron,
Whisper White
Thursday, April 11, 2013
clean and simple - part 1
Sometimes life just gets crazy busy, doesn't it??? You want to create, but you just don't have time to get all the supplies out... or the energy to put them away! That's when it's time for a card with a simple design, that's quick and easy to create.
I was blog surfing the other day, and visited one of my favorites - Clean & Simple Stamping. Most of their sketches can be turned into a card in only a few minutes, without trashing your craft space! This is my version of their simple card sketch #234.
When I want quick and easy cards, I start with the Notecards. They are pre-cut and scored, so that saves time. Plus they are a smaller size, so you can finish quickly.
After adding a layer of Floral District DSP, I stamped my greeting in Island Indigo. From the Button Buddies stamp set, I stamped the flower image in Rich Razzleberry ink, punched it out, and attached it with Dimesionals. **Note: images that coordinate with punches save time. :}
Using a Circle punch, I made a "leaf" to slip behind the flower. And a simple Button adds the finishing touch. Now all I have to do is write my message and address the envelope (which came with the Notecards, and saves me the time of searching for one!).
Labels:
Baja Breeze,
DSP,
Notecard,
punch,
Rich Razzleberry,
Whisper White
Thursday, March 14, 2013
how to stamp a bloomin' marvelous card
Today's card is just "bloomin' marvelous" if I do say so myself ;)
I wanted a clean background with lots of "white space," so I chose a layer of Whisper White card stock and added simple texture using the Vine Street* Embossing Folder.
Before adhering the embossed layer, I tied on some Sycamore Street* ribbon. Just for fun, I added a bow of Pool Party Baker's Twine over the ribbon's knot.
Using the Bloomin' Marvelous* stamp set, I stamped the sentiment in Island Indigo ink and the flowers in Pool Party ink. The Decorative Label Punch creates the perfect shape for this layer. For a pop of color, I stamped the leafy image in Summer Starfruit and the butterfly in Tangerine Tango. I "fussy cut" the leaves with my Snips, but the butterfly image punches out ever so nicely with the Bitty Butterfly Punch.
*Sale-A-Bration items
And because I think you are all so "bloomin' marvelous," here's the simple card sketch...
Thanks for stopping by my blog... I hope you all have a "bloomin' marvelous" day!
Thursday, February 14, 2013
Happy Valentine's Day!!
I hope everyone had a fabulous day. I have a quick post to share with you tonight... a little Valentine's love I left in the teacher's lounge (at the kids' school) today :}
I simply covered a can of coffee with some Twitterpated DSP and card stock. The cute little coffee cup stamp is from one of the stamp sets you can get for free right now during Sale-a-Bration -- Patterned Occasions (w:129621 c:129624)
I used the 3-1/2" Circle die to create the perfect background to cover the lid. The heart Embosslit and Punches made it easy to add pretty details. If you don't already have the Teeny Tiny Wishes stamp set, add it to your cart - it has 24 greetings to cover almost every occasion!
How about a bonus project tonight??? Here's the Valentine card Aaron chose for his teacher:
He likes the images from the Up, Up & Away stamp set... but what kid doesn't like baloons???
Thanks for dropping by!! Love ya... mmmmwaaah! :}
Tuesday, November 27, 2012
Lovely As a Christmas Tree
I'll bet you have a few "oldies but goodies" in your stamp stash. You know, the ones that are just so perfect... too good to ever part with. For me, Lovely As A Tree is that stamp set. It's a classic! And that's why it works so well for a traditional Christmas card.
Remember this template from the vintage Christmas card? It's such an easy card layout that we used it on two cards in my class at the bakery.
For the background, I used a layer of Cherry Cobbler Core'dinations card stock. It adds just a hint of texture to my card. I chose not to add another layer in the background, allowing more of the Garden Green card base to show.
The pine tree is stamped in Garden Green ink onto a 2"x4" layer of Whisper White card stock. My greeting (Petite Pairs) is also stamped in Garden Green. The 3/8" Taffeta Ribbon is the perfect compliment to this card.
Don't you just love Garden Green and Cherry Cobbler together? I'm using this color combination in another class at the bakery on December 4th. I'd love for my local stamping friends to join me!
There's a sign up sheet inside Wildflour Artisan Bakery & Cafe (256 West Main St, Decatur). If you're not too full after indulging in some sweets, be sure to check out the new renovations in the Root Cellar!
Labels:
Card Template 7,
Cherry Cobbler,
Christmas,
Garden Green,
Ribbon,
Whisper White
Monday, November 26, 2012
simple, modern Christmas card
Hello stamping friends! Sorry for the inconsistent posting the last few days. Between traveling out of town for the holiday and fighting this cold, my head is "in the clouds." The cold, which started Thursday night, is winning the battle - grrr! And while I really wanted to pound my phone into the floor when the alarm went off this morning, life goes on, and I didn't want to wait another day to share this cute card with you.
This is my modern style Christmas card from my class at the bakery. To create that modern feel I used a clean design, eye-popping and unexpected colors, and lots of "white space."
The Whisper White layer has two scored lines an 1/8" apart, a little strip of Primrose Petals DSP folded over the top edge, and is adhered with Dimensionals.
I stamped the greeting (Curly Cute stamp set) in Lucky Limeade ink, and then adhered the images. Those cute little Christmas images from the Merry Minis stamp set are stamped in Lucky Limeade, Primrose Petals, and Island Indigo ink, then punched out with the Merry Minis punches. ***TIP: to adhere the images as evenly spaced as possible, I attached the center image first, then the outside images, and then the remaining two.
While you are burning up the keyboard this Cyber Monday, don't forget all the great deals in the Online Extravaganza in my online store. Happy shopping! :}
Labels:
card,
Christmas,
DSP,
Island Indigo,
Lucky Limeade,
Primrose Petals,
punch,
Simply Scored,
Whisper White
Wednesday, October 24, 2012
speedy notecards
Ugh. That's my word for today :(
I've given birth to two children. The first with an attempted epidural that turned into a sort of spinal tap, and the second was an ohmygoodness, don'tpush, Ineedadoctor, notimefordrugs, herehecomes experience. I'm quite sure I would rather go through both of those experiences again over having dental work. Yesterday at my dentist's office (thank goodness they're so nice) I had to have some things fixed. I had one teeny tiny cavity, and then I needed a repair to the filling that was coming loose on a front tooth (broke off parts of my front teeth in 2nd grade; running on cement = bad idea). So that means I had two, TWO, shots in the upper gums yesterday. Ugh.
I spent most of the evening on the couch in my jammies feeling like my head had been hit with a hammer, so today I'm sharing cards made by those two darling children I just mentioned. ;)
stamp sets: Need for Speed, Sassy Salutations
Ben(8) designed his card with the race car, and then Aaron(5) followed Ben's lead. They were making Notecards to thank those who sponsored them in a fundraising walk at school. I had Ben write the message inside:
I didn't have the heart to correct his spelling. :}
My boys love papercrafting just as much as I do! Plus, it's nice to do an activity together that doesn't involve ninjas. ;)
When you're ordering supplies, don't forget that your little ones might like something, too. If you're worried about spending too much on the "kid stash," check out my Online-Only Clearance Rack. Several new items were just added.
Ok, I'm off to tackle this crazy day. Ben has a doctor's appointment out of town, so I'll be getting him from school in a little bit. And when I bring him back to school, I'm finally off to the Pumpkin Patch with Aaron's class. Yay for no rain today!! Aaron has been so upset with all the rain delays. Cross your fingers that I get some good pictures! :}
Labels:
Basic Black,
card,
Embossing Folder,
family,
Whisper White
Wednesday, October 17, 2012
shoebox swap - part 3
I'm wrapping up the shoebox swap posts today with a Christmas card designed by Lynn. You know how much I love all those yummy little details, and this card is full of them!! :}
I mean, how can you not love a card that has both heat embossing AND dry embossing??!!
We used the Northern Flurry Embossing Folder on the Whisper White layer before adhering it to the Island Indigo card base. The images (Ornament Keepsakes) are stamped in VersaMark ink, with the smaller image heat embossed using White Embossing Powder and the ornament heat embossed using Silver Embossing Powder. Both images were die cut in the Holiday Ornaments Framelits.
I tried something a teeny bit different... instead of trimming the straight ends of the DSP strips, I left a tiny bit to go past the edge of the Brushed Silver card stock, and then folded the ends under. I really like this "finished" look, and I'll be trying it again soon!
Well, I'd better get my rear in gear. I'm volunteering at the grade school's Book Fair today. It makes my heart so happy how much these students love to read! Have a wonderful day :}
Labels:
Big Shot,
card,
Cherry Cobbler,
Christmas,
DSP,
Embossing Folder,
Framelits,
heat embossing,
Island Indigo,
Ribbon,
VersaMark,
Whisper White
Saturday, September 29, 2012
scrappin' Halloween
When I joined Stampin' Up! five years ago, I had visions of getting all caught up on my scrapbooking. Stop laughing. It didn't happen... it's not happening... it won't happen anytime soon. I get a little more done now than I did then... thank goodness for My Digital Studio! I spend a lot of time on each scrapbook page; sometimes it takes me a week or more to finish. So cards are naturally appealing to me as something I can finish in a short amount of time.
Since I spend a lot of time making cards, I was really happy to get a scrapbook page done for my Halloween class at the bakery.
I haven't decided yet if I'm going to use this in a new 8x8 album, or if I'm going to add this page on top of a 12x12 page. I like the new 8x8 size; it might help me get caught up on my scrapbooking a little faster ;)
Planning my class around the Ghoulish Googlies Bundle made choosing the colors easy (Basic Black, Pumpkin Pie, Lucky Limeade, Whisper White). I added the Basic Gray for a little bit more contrast.
The bat and the mummy are stamped in black StazOn ink and "fussy cut." After adhering them to the page with Dimensionals, I added the googly eyes... CUTE!
My Big Shot got a good workout to create this page! The Spider Web Embossing Folder, Sweet Buttons Embosslit, and the Tasteful Trim Bigz XL die all got to come out and play :)
On a side note, I had a beautiful start to my morning. The boys both slept well and woke up in great moods. I successfully tried a new recipe for breakfast. And I got to sit on the deck in the sunshine drinking coffee, while chatting with my hubby. Well, chatting on the phone anyway. I was so glad to hear from him, since he was traveling all night. (Don't you just love how men don't need hotel rooms - they can just take turns driving... ugh.) Chris is traveling to Wyoming with some friends and his brother for an antelope hunt. If you have a moment, any thoughts and prayers for a safe trip would be appreciated :)
While I'm not thrilled about his little vacation, I do hope they are successful. With the price of meat sure to go up soon due to our dry summer, it would be nice to have a freezer full of cheap meat. Hmmmm, I think a Pinterest search for antelope recipes would be a "productive" way to spend the afternoon, don't you? ;)
Tuesday, September 25, 2012
put on your Party Hat
I know you've been anxiously waiting to see another hand-stamped birthday card from my class at Wildflour Bakery ;) I feel like I'm getting to experience this fun class twice... the first time at the actual class, and then again by sharing them with you. I know I can count on you to "oooh" and "aaah" just like my stampers did at class time! ;)
I got my inspiration for this one from a card made by another demonstrator, but I can't remember where I saw it. So, to whomever gave me the starting point for this card - thanks!
I love the layers and bright colors (Gumball Green, Pacific Point, Melon Mambo) on this card! I think that leaving a lot of Whisper White showing really helps the bright colors "pop" without being overwhelming. To add some subtle interest to the 3-3/4"x5" Whisper White layer, we dry embossed it through the Big Shot using the Stripes Embossing Folder. The images from the Pennant Parade stamp set are stinkin' cute, and the coordinating punch makes it fun and easy to use :}
I almost used a layer of DSP behind the punched circle, but the Scallop Dots ribbon adds some more texture - which I really like! After punching out the pom-pom images, we added some tiny Rhinestones for the perfect amount of "bling" :)
OK... one more birthday card to go, and then it's on to some Halloween projects! Oooh... aaah ;)
Labels:
Big Shot,
birthday,
card,
Embossing Folder,
Gumball Green,
Melon Mambo,
Pacific Point,
punch,
Ribbon,
Whisper White
Wednesday, August 29, 2012
black and brown
Here are the last two crayon gifts ...
Black & White Day
stamp set: Need for Speed
Big Shot items: Top Note Bigz Die, Chevron Embossing Folder
Brown Day
stamp set: Dinoroar
Ok, so technically Aaron's teacher did not have an official "brown day," but I couldn't have a bunch of leftover crayons!
This was such a fun series of projects to create... but I'm kinda glad it's over and I can move on to some Fall and Christmas projects :}
Tuesday, August 21, 2012
You can't have too many birthday cards!
I was cleaning out my "desktop" today and came across this birthday card I made a few months ago, but I haven't had a chance to share it yet:
Isn't it just so bright and pretty??? I love the striking contrast between the Lucky Limeade and the white... it's so "crisp."
The card base is Whisper White card stock. To create the fancy layer, dry emboss the Lucky Limeade card stock using the Fancy Fan Embossing Folder. Then, use the brayer to add Whisper White Craft ink gently to the raised areas. You can let that dry overnight, OR use the new Heat Tool on the low setting to dry it in a minute :} After adhering that layer, tie the 5/8" Organza Ribbon around the card close to the fold.
Stamp the flowers (Betsy's Blossoms stamp set) in Lucky Limeade ink and "fussy" cut them out; adhere to the card using Dimensionals. And of course the center of each flower needs a little bling ;) Stamp the "happy birthday" sentiment (Itty Bitty Banners stamp set) in Lucky Limeade ink onto Lucky Limeade card stock, then die cut it through the Big Shot using the Bitty Banners Framelits. I adhered the banner using two "stacked" Dimensionals on each end.
Thanks for dropping by today!! Have a good one :}
Labels:
Betsy's Blossoms,
Big Shot,
birthday,
card,
Embossing Folder,
Framelits,
Lucky Limeade,
Ribbon,
Whisper White
Friday, August 17, 2012
I LOVE my dentist!
Yes, you read that title correctly ;}
I feel so blessed to have found the most wonderful dentist on this planet. And it's not just my dentist who is so amazing... the whole office is! They are some of the sweetest people I've ever met. As I mentioned in a previous post, I had more to say about the kids going to the dentist, so here ya go...My youngest, Aaron, had no problems at all. It was his first trip to the dentist, so he was a little nervous and silly, but all went well :)
However, Benjamin is going to have quite a bit of dental work coming his way (appliances, braces, etc). Sooooo, to get that ball rolling, Ben had to have those really fun impressions of his teeth taken. Now, my sweet little Ben has the strongest gag reflex of any human. Ever. In fact, his first day of Kindergarten, he gagged on some "lick & stick" paper pieces while working on a craft. I remember the teachers and office staff laughing at how they'd never seen a kid do that before. And don't even think about asking Ben to lick an envelope for you! Anyway, let's just say that the impressions didn't go well. Our dentist was so patient and understanding, and she kept trying to work with Ben. I kept thinking that she probably shouldn't wear such cute shoes to work ;} Since I'm pretty sure the staff ended up washing two loads of towels that day, I had to put together a funny "thank-you" gift.
After wrapping up the towels with some ribbon, I added a pretty flower (inspired by the notebook on p116 of the catalog).
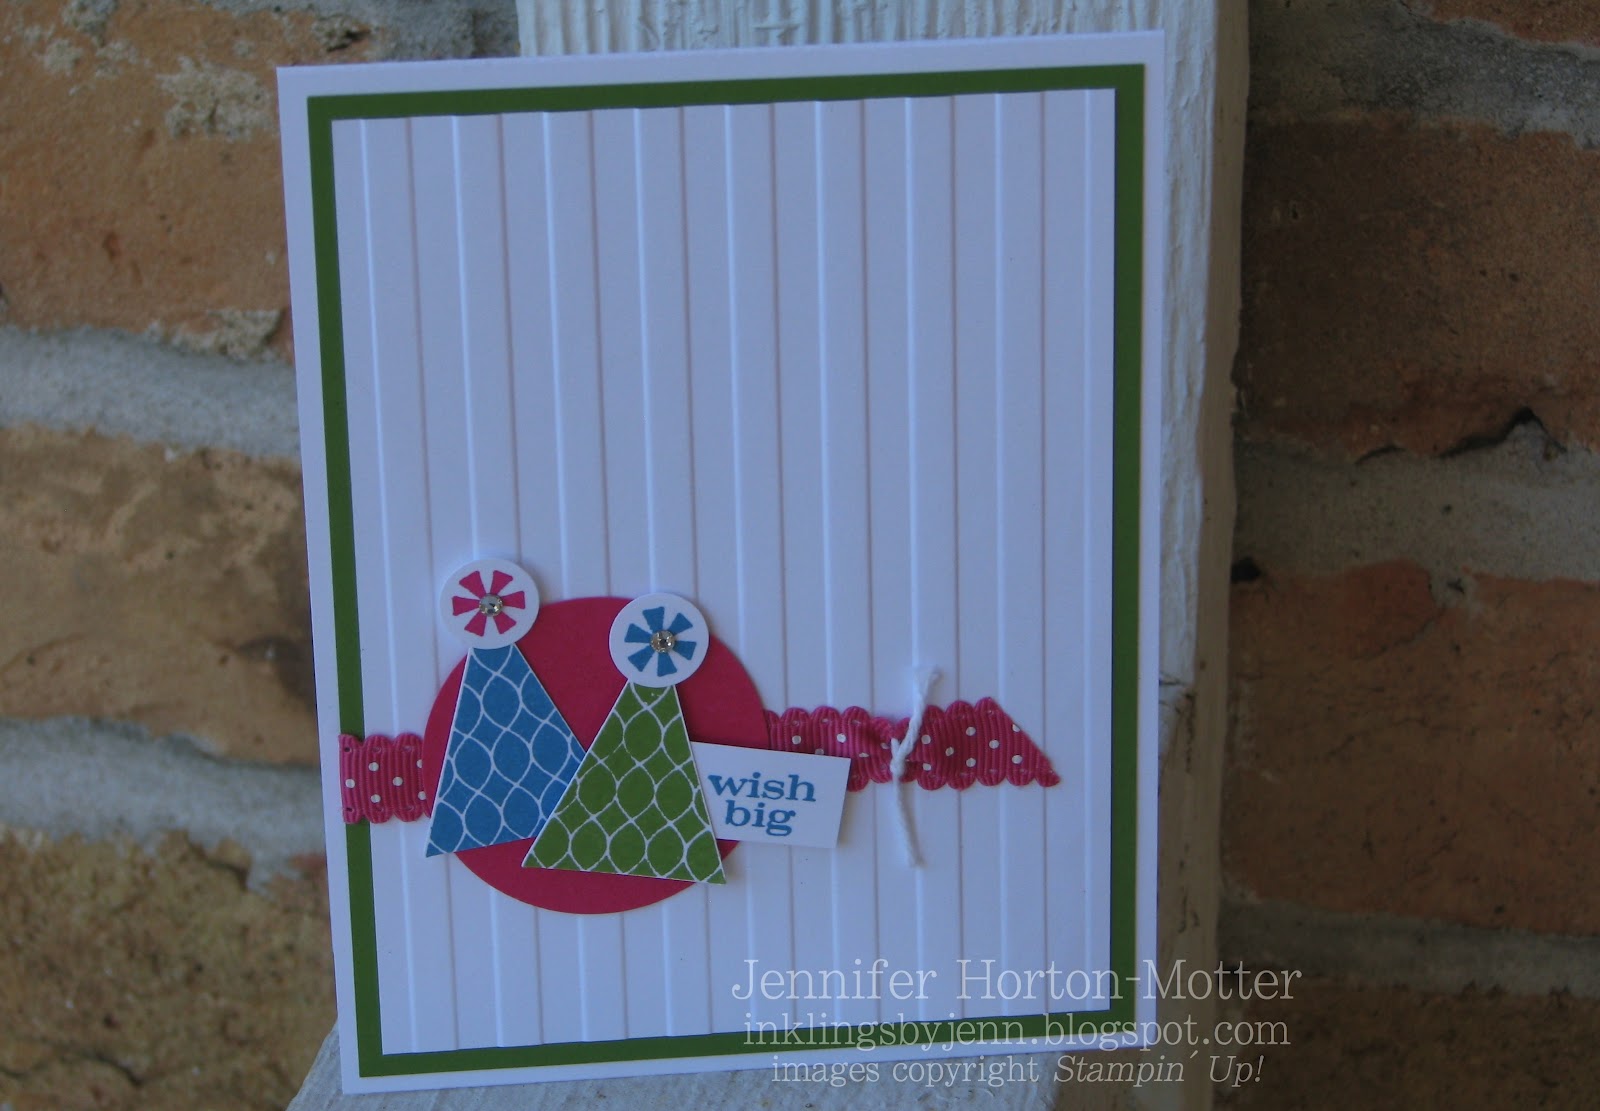
And I tucked a cute little 3x3 card under the ribbon:
I LOVE that I can make coordinating gifts and cards!!
stamp sets: Daydream Medallions, A Word For You
ink: Daffodil Delight, Old Olive, Tangerine Tango, Regal Rose
card stock: Daffodil Delight, Old Olive, Tangerine Tango, Regal Rose, Whisper White
punch: Dotted Scallop Ribbon Border
Big Shot and Floral Frames Framelits Dies
Accessories: Daffodil Delight button, White Baker's Twine, Basic Rhinestones
You can find these goodies and more in my online store :}
We were pretty bummed that after all that work, the lab couldn't use any of the "top" impressions. So I took Ben in this morning (at 7am- yowza!) for round 2.
Dr. Natalie tried a few different techniques, and I am happy to report that she got a good impression on the first try!! Woohoo!!!! Now, on to the next step... :}
Have a wonderful weekend!
Labels:
Big Shot,
Daffodil Delight,
family,
Framelits,
gift,
Old Olive,
Regal Rose,
Ribbon,
Tangerine Tango,
Whisper White
Subscribe to:
Posts (Atom)