Showing posts with label Betsy's Blossoms. Show all posts

Tuesday, August 21, 2012

You can't have too many birthday cards!

I was cleaning out my "desktop" today and came across this birthday card I made a few months ago, but I haven't had a chance to share it yet: 
Isn't it just so bright and pretty??? I love the striking contrast between the Lucky Limeade and the white... it's so "crisp."
The card base is Whisper White card stock. To create the fancy layer, dry emboss the Lucky Limeade card stock using the Fancy Fan Embossing Folder. Then, use the brayer to add Whisper White Craft ink gently to the raised areas. You can let that dry overnight, OR use the new Heat Tool on the low setting to dry it in a minute :}  After adhering that layer, tie the 5/8" Organza Ribbon around the card close to the fold. 
Stamp the flowers (Betsy's Blossoms stamp set) in Lucky Limeade ink and "fussy" cut them out; adhere to the card using Dimensionals. And of course the center of each flower needs a little bling ;)  Stamp the "happy birthday" sentiment (Itty Bitty Banners stamp set) in Lucky Limeade ink onto Lucky Limeade card stock, then die cut it through the Big Shot using the Bitty Banners Framelits. I adhered the banner using two "stacked" Dimensionals on each end.

Thanks for dropping by today!! Have a good one :}


Pin It!

Sunday, July 1, 2012

stamping with friends

We all know how fun it is to spend time stamping with our friends. I'm not sure which is more therapeutic - the stamping or the conversation. It's been a while, but the last time my friend Dawn and I got a chance to stamp together, she inspired me to make this card: 
The focal point and the ribbon have tons of detail, so I wanted to keep the rest of the card pretty simple. I love using the Simply Scored to create fun and interesting backgrounds, that don't overpower my project.
The ribbon took care of the vertical "lines," so I used the Diagonal Plate and scored every half-inch for this background. I scored the inside of the card so that the diagonal lines would be raised (rather than dented in) on the card-front.

And here's a look at the card my talented friend Dawn created: 
She scored her card on the front, creating a more subtle texture, which is a perfect compliment to these subtle colors.
I hope you can find time this week to stamp with one of your good friends. It's usually difficult to find the time for fun with friends, but it's always well worth it!

Pin It!

Friday, May 18, 2012

a busy day!

Holy Moly! I can't believe how busy my rummage sale was today... I can't even imagine how busy tomorrow is going to be! I was worried that I wouldn't get time to stamp at all today (again), but there was a little break around lunchtime. Sooooo, I had a few minutes to whip up a cute little card  :}
I am in love with the new "In Color" Raspberry Ripple... and it looks so great paired with Summer Starfruit and Early Espresso. Then I threw in a touch of Primrose Petals, just for fun  :}
The images from the Betsy's Blossoms stamp set are so stinkin' cute! Snipping out the branch image was a little fussy, but totally worth it!

Well, I better whip up some supper and get to bed early... tomorrow is probably going to be crazy!

Pin It!

Monday, May 14, 2012

Betsy's Blossoms sneak peek

Did you ever end up almost late for something because an idea jumped into your creative brain, that you just had to make right then? That's totally what happened to me this morning! While I was eating breakfast, an idea for a card flew into my head using the new Betsy's Blossoms stamp set.
I could picture this pretty little creation and each detail, and I knew it would only take a few minutes...  I stamped a simple background using Raspberry Ripple ink and card stock. Then I tied two pieces of Early Espresso 1/8" Taffeta Ribbon around that layer. For added interest, I adhered the background layer to the Early Espresso card base using Dimensionals.
For my focal point, I stamped the largest flower in the Betsy's Blossoms stamp set in Summer Starfruit ink onto Very Vanilla card stock. I wasn't crazy about how it looked punched out with a circle punch, so I took a few seconds and hand cut this pretty blossom with my Paper Snips. After adhering it to the card with Dimensionals, I added a Large Basic Pearl to the center for that perfect finishing touch.

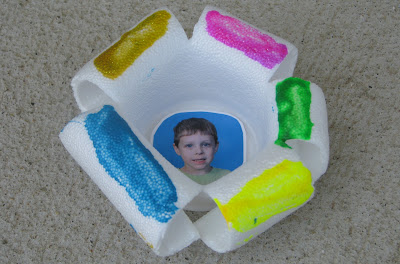
Luckily I made it to my youngest son's Mother's Day program at school... just in time. The 4K teachers at the school do such a wonderful job! The kids sang songs about Mommies, sat with us for a story time, and served us muffins and juice. We even had a lovely "corsage" waiting for us when we arrived!
Such a clever project! Who knew you could make a styrofoam cup so cute??! Love it  :}

Pin It!
Related Posts Plugin for WordPress, Blogger...