Showing posts with label birthday. Show all posts

Thursday, May 2, 2013

sketch happy

Yay, yay, yay! I had a good chunk of time to stamp yesterday!! It was fabulous. I made a ton of cards, and tried out a few sketches. Here's what I came up with for the Paper Players Sketch 143:
I chose all of my papers from the same package (Patio Party), so my card came together very quickly. The two Paper Daisies and the Summer Starfruit Dahlia layer nicely, and are adhered with my favorite liquid glue
Do you spy something new and fabulous??? My sentiment is from the Label Love stamp set, which coordinates ever so nicely with the Artisan Label punch.
Well, I'm off to sub again today... Kindergarten - the BEST! Don't have too much fun without me!   :}

Pin It!

Monday, April 29, 2013

what to do with all these embellishments?

When it's time for accessories to retire, I start looking at my stash of embellishments and think of all the ways I can use them up. 
How about using a whole bunch on one card??? All these brads were perfect for a birthday card - they remind me of candy dots or bits of confetti. 
After stamping my greeting (Sassy Salutations) in Marina Mist ink onto a 4-1/2 x 3" layer of Whisper White card stock, I used the Paper-Piercing Tool and the Essentials Paper-Piercing Pack to create two parallel rows of holes so my brads would be aligned. That layer is then attached with Dimensionals to a Notecard

So what do you think? Any other ideas for me to use up my stash?  :} 


Pin It!

Saturday, April 27, 2013

happy 2nd birthday, Olive Jane

Today is my sweet little niece's 2nd birthday! I'm looking forward to celebrating with her tomorrow at her big birthday bash. Of course Aunt Jenn made coordinating tags and a special birthday card!  :} 
I chose Pretty in Pink (a retiring color), Pear Pizzazz (a returning color), and Basic Gray for my colors. The birthday cake (Make a Wish stamp set) looks so pretty after die-cutting with a Labels Collection Framelit, and adhering some Basic Pearls
Having the age number on birthday cards for little ones is just too cute, so I stamped and fussy-cut a number 2 (from the Memorable Moments stamp set), and adhered that to a Pear Pizzazz 7/8" Scallop Circle. Technically, the Baker's Twine is Lucky Limeade and not Pear Pizzazz, but I'm hoping Olive won't notice that subtle difference.   ;) 
Birthday gifts should have tags that coordinate with the card, right??? It was super easy to make the coordinating tags by using the same colors and DSP (Twitterpated), as well as incorporating some of the same design elements. 
I die cut the top edge of the tag with a Labels Collection Framelit.  *** Tip: if you want to use a Framelit to create a decorative edge, turn the handle on your Big Shot just enough so that only the portion you want trimmed gets cut, then turn the handle the other way to back up the platform. 
I used the same embossing folder on the card and tags. *** Tip: use the embossing folder after die-cutting or your texture will get smooshed. The Memorable Moments stamp set has that nice stitched image to fit perfectly in the Famelit, and I like the font of the greetings in this stamp set. I added a stamped number 2 (Number It) to the tags as well, and I used the same embellishments (Basic Pearls) on both projects. 

I can't wait to give Olive a great big hug and watch her open all the presents. Two is a fun age at gift opening time, since they now know exactly what those bags and boxes are all about! 

Pin It!

Thursday, April 4, 2013

Hey... Happy Birthday!

Today is my little brother's birthday! Sooooo, I'm sharing the card he'll be getting (late - aagh!) in the mail. 
I wanted a masculine card, but with a brighter color combination. I turned to the Color Coach for "advice" and chose the Creative Combination on the Island Indigo card, which suggests adding More Mustard and Lucky Limeade.  (Be sure to read to the end of the post for some information about More Mustard!) 

So what makes a "masculine card"... masculine? 
- texture (Argyle Embossing Folder, distressed and torn edges)
- masculine colors (I'll let each individual decide what that means, but for me it means neutrals, blues, "fall" colors) 
- a simple and/or clean design (I made this card in less than 10 minutes by keeping the details and layout easy) 
- no ribbon (in my humble opinion, Baker's Twine and Linen Thread are exempt from this rule  :P)
I also like to add "extra ink" by sponging edges and/or spritzing with markers and the Color Spritzer Tool
I'll bet you're wondering about those stamped images. Other than the "happy birthday" greeting from the Teeny Tiny Wishes stamp set, the rest of the images are from the new Designer Typeset photopolymer stamps. They are completely clear, and are used with acrylic blocks

Apparently, even though my birthday isn't for another 2-1/2 weeks, I got an early birthday present this morning! 
I couldn't be more excited. I am especially pleased with the changes to the Subtles Collection! I have really missed Pear Pizzazz, and for those of you who haven't been stamping forever, you will really like Soft Sky.   :}     

 And here's a little "birthday present" for you... for whenever your birthday is! It's the card sketch for today's card - yay!! It would make me super happy if you "pinned" this sketch. After all, it's nice to share.   ;)  All you have to do is click that tiny little red "Pin it" button at the bottom of the post. Thanks!
  

Pin It!

Sunday, March 24, 2013

one sketch... two cards

Yesterday was such a beautiful day! It was sunny and kinda warm (51 degrees in the afternoon!), so the boys spent the day running around outside keeping you all safe from pirates, dragons, storm troopers, and aliens. AND, I had soooo much fun at my afternoon stamping class. Do you know what we will be doing today? Shoveling!
How do you like the contrast of our palm branches in the snow??? Crazy Spring weather! 

For both of the cards I'm sharing today, I used the same card sketch:

Here's the simple birthday card from yesterday's class-
Embossing Folder: Chevron


And here's the card from the craft night I held at the grade school last week- 
stamp set: Madison Avenue 
Embossing Folder: Vine Street 
DSP: Sycamore Street 

Well, whatever kind of weather Spring has brought to your door today, I hope your day is fabulous! Thanks for stopping by my blog... now go stamp something!!  :

Pin It!

Monday, March 18, 2013

one card, two ways

In my last post, I shared the card I made for the shoebox swap I participated in. It was tons of fun, and everyone had such pretty cards. This is the card that Lynn designed for us - 
Don't you just love these colors together? So pretty. She chose the Secret Garden stamp set and Framelits (as well as the Window Frames Framelits) for the focal point. 

I thought it would be fun to try using the same pieces and create a birthday card for my hubby - 
Ta da! After stamping the sentiment (Make a Wish), I used the Argyle Embossing Folder to create a masculine look on my card. I also switched the card stock layer die-cut with the smaller Window Frame Framelit, for a layer of Print Poetry DSP.
The 1-3/8" Circle punch works great with the images from the Blue Ribbon stamp set to create the focal point. 

Don't you just love it when you can use a great card design more than once??  Yay!!  :}

Pin It!

Friday, November 16, 2012

a simple card sketch - four ways!

Sometimes I like to give the creative side of my brain a little kick... either to get things started or to get my creativity to move in a different direction. I like to read paper crafting magazines, look through the photo gallery in Stampin' Up!'s online forum for demonstrators, and browse blogs. Earlier this week, a card sketch on the Clean & Simple blog caught my eye. I liked it so much, that I made quite a variety of projects using the same sketch. Today I'm sharing three cards and a  gift tag, all inspired by the sketch.   :} 


stamp set: Curly Cute          Embossing Folder: Lacy Brocade

stamp sets: Merry Minis, Tiny Tags 

Creating the scalloped-edge rectangle was super easy! Using the Scallop Squares Duo Bigz Die, I simply die-cut two of each square. For the card fronts, I adhered the larger squares together with five scallops overlapping. For the tag, the smaller squares are adhered together with three scallops overlapping. 
Speaking of die-cutting, have you ever wished you could see all of Stampin' Up!'s products for the Big Shot in one place??? Your wish has been granted!  :}  

Don't have the Big Shot (yet) but want to create those beautiful embossed textures (like on the thank-you card) with the Embossing Folders??? Another wish granted!! The Texture Boutique Embossing Machine is here! 

whew... That turned out to be quite a long post! Thanks for sticking around to the end.  Now go stamp!!  ;}


Pin It!

Wednesday, September 26, 2012

a CASEd birthday card

At the beginning of August, I attended the team meeting held by my upline's upline's upline... How's that for 1 big happy stampin' family?!  :}  There are always great projects to make at the meetings, which I love recreating for classes and workshops. First, I'll share the card we made at the meeting: 
Super cute! And I know exactly who I'm sending this to :} 
Framelits: Labels Collection, Apothecary Accents, Bitty Banners, Window Frames 

Since I liked the card so much, I thought it would be perfect for a birthday card in my stamping class at Wildflour Bakery... so I CASEd it (CASE = copy and share everything). 
For the card base I used Summer Starfruit card stock, and I chose the Patio Party DSP for my paper strips. I also decided to adhere the strips a little lower on the card front.
After stamping the birthday sentiment (from Itty Bitty Banners) in Summer Starfruit ink, I used a Bitty Banners Framelit to cut it out. It's then layered atop Primrose Petals (Large Oval punch), Midnight Muse (Apothecary Accents Framelit), and Summer Starfruit (Labels Framelit) card stock. The piercing around the edge (Festive Paper-Piercing Pack) of the Summer Starfruit layer adds fabulous detail! 

Just curious... which one of your projects was your favorite CASE? Feel free to share by leaving me a comment. 
And in the spirit of sharing ideas, I'd absolutely love it if you would "share" this easy card idea by using one of the little buttons below (Pin, Like, Tweet, Share). Thanks! And have a wonderful day!  :}

Pin It!

Tuesday, September 25, 2012

put on your Party Hat

I know you've been anxiously waiting to see another hand-stamped birthday card from my class at Wildflour Bakery  ;)  I feel like I'm getting to experience this fun class twice... the first time at the actual class, and then again by sharing them with you. I know I can count on you to "oooh" and "aaah" just like my stampers did at class time!  ;) 
I got my inspiration for this one from a card made by another demonstrator, but I can't remember where I saw it. So, to whomever gave me the starting point for this card - thanks! 
I love the layers and bright colors (Gumball Green, Pacific Point, Melon Mambo) on this card! I think that leaving a lot of Whisper White showing really helps the bright colors "pop" without being overwhelming. To add some subtle interest to the 3-3/4"x5" Whisper White layer, we dry embossed it through the Big Shot using the Stripes Embossing Folder. The images from the Pennant Parade stamp set are stinkin' cute, and the coordinating punch makes it fun and easy to use  :}
I almost used a layer of DSP behind the punched circle, but the Scallop Dots ribbon adds some more texture - which I really like! After punching out the pom-pom images, we added some tiny Rhinestones for the perfect amount of "bling"  :)
OK... one more birthday card to go, and then it's on to some Halloween projects! Oooh... aaah  ;)

Pin It!

Monday, September 24, 2012

a "sweet" color combination

Here's another card we made at my birthday card class at Wildflour Bakery
Not only did all these new stampers get to enjoy some sweet desserts, I introduced this "sweet" color combination to them - Pool Party, Calypso Coral, and Gumball Green. I discovered how nicely these colors play together while fooling around with some card stock scraps. I LOVE how my card turned out! 
The tiny little scalloped strip of Gumball Green card stock is punched out using the Dotted Scallop Ribbon Border punch. And the Calypso Coral layer is dry embossed through the Big Shot using the Fancy Fan Embossing Folder.
After stamping the sentiment (from the You're Amazing stamp set) in Gumball Green ink onto the same color card stock, I used my Big Shot again, but this time with a Framelit from the Apothecary Accents collection. And once I had my die-cut layer, I punched two tiny holes for the Printed Brads. Before adhering to my card with Dimensionals, I tucked three 1/2" wide strips of DSP behind the Gumball Green card stock. Super cute!!  :)
Thanks for stopping by to see today's birthday card... I'll have another one for you tomorrow. Happy Monday!!  ;}


Pin It!

Sunday, September 23, 2012

stamping at the bakery

Part of the adventure in our move is finding new places to stamp and new people to stamp with  :}  There's a fabulous bakery in Decatur that not only has some of the most amazing soups, sandwiches, and desserts... it's also a super fun place to stamp! I already held two classes this month at Wildflour Bakery, and I can't wait for the next two in October!! This week I will be sharing the fun projects we made  :}  At my first class (on the 11th), we made four birthday cards.

I love the bright, cheerful colors on this card. And that bicycle couldn't be any cuter! Did you know that Stampin' Up! designs an exclusive stamp set each year to help support Ronald McDonald House Charities®?


This year's stamp set is called Moving Forward, and for each purchase of this stamp set, Stampin' Up! donates $3 to RMHC®. So... it's kinda like a moral obligation to purchase this stamp set, too... right???  ;}
We used the masking technique to stamp our image and sentiment. We "masked" the text under the bicycle stamp using a "sticky" note, so that we would only apply ink to the image. (Just remember to remove the "sticky" note before stamping on the card stock.) For the birthday greeting, we masked the blimp image and inked only the text. To add a cute finishing touch, we used markers to "ink" the flowers, and stamped them in the bicycle basket.
Thanks for dropping by today - check back tomorrow to see another cute birthday card :}


Pin It!

Tuesday, August 21, 2012

You can't have too many birthday cards!

I was cleaning out my "desktop" today and came across this birthday card I made a few months ago, but I haven't had a chance to share it yet: 
Isn't it just so bright and pretty??? I love the striking contrast between the Lucky Limeade and the white... it's so "crisp."
The card base is Whisper White card stock. To create the fancy layer, dry emboss the Lucky Limeade card stock using the Fancy Fan Embossing Folder. Then, use the brayer to add Whisper White Craft ink gently to the raised areas. You can let that dry overnight, OR use the new Heat Tool on the low setting to dry it in a minute :}  After adhering that layer, tie the 5/8" Organza Ribbon around the card close to the fold. 
Stamp the flowers (Betsy's Blossoms stamp set) in Lucky Limeade ink and "fussy" cut them out; adhere to the card using Dimensionals. And of course the center of each flower needs a little bling ;)  Stamp the "happy birthday" sentiment (Itty Bitty Banners stamp set) in Lucky Limeade ink onto Lucky Limeade card stock, then die cut it through the Big Shot using the Bitty Banners Framelits. I adhered the banner using two "stacked" Dimensionals on each end.

Thanks for dropping by today!! Have a good one :}


Pin It!

Thursday, July 5, 2012

happy birthday, Mom!

Happy birthday to my sweet mother, who is celebrating her 24th birthday... again  ;) 
stamp sets: Mixed Bunch, Petite Pairs
ink: Midnight Muse, Summer Starfruit, Soft Suede
card stock: Soft Suede, Summer Starfruit, Very Vanilla
Designer Series Paper: Comfort Cafe
punches: 2-1/2" Circle, Blossom 


Pin It!

Monday, July 2, 2012

a clean and simple card for a busy day

I am so exhausted from this past week! And this week is going to be just as crazy, so my posts are going to be short and sweet  :} 
For today's project, I turned to this clean and simple sketch
I used the 1-1/4" Square punch and Summer Smooches DSP to add a quick and bright background to a pre-cut, pre-scored Note Card. I really like how the bright colors liven up such a simple card  :} 

Thanks for dropping by... have a great day!!

Pin It!

Monday, June 4, 2012

beautiful wings

I found another clean and simple card sketch that I just love
I seriously love how "clean" and "not fussy" this card looks! And it only took a few minutes to put together  :}
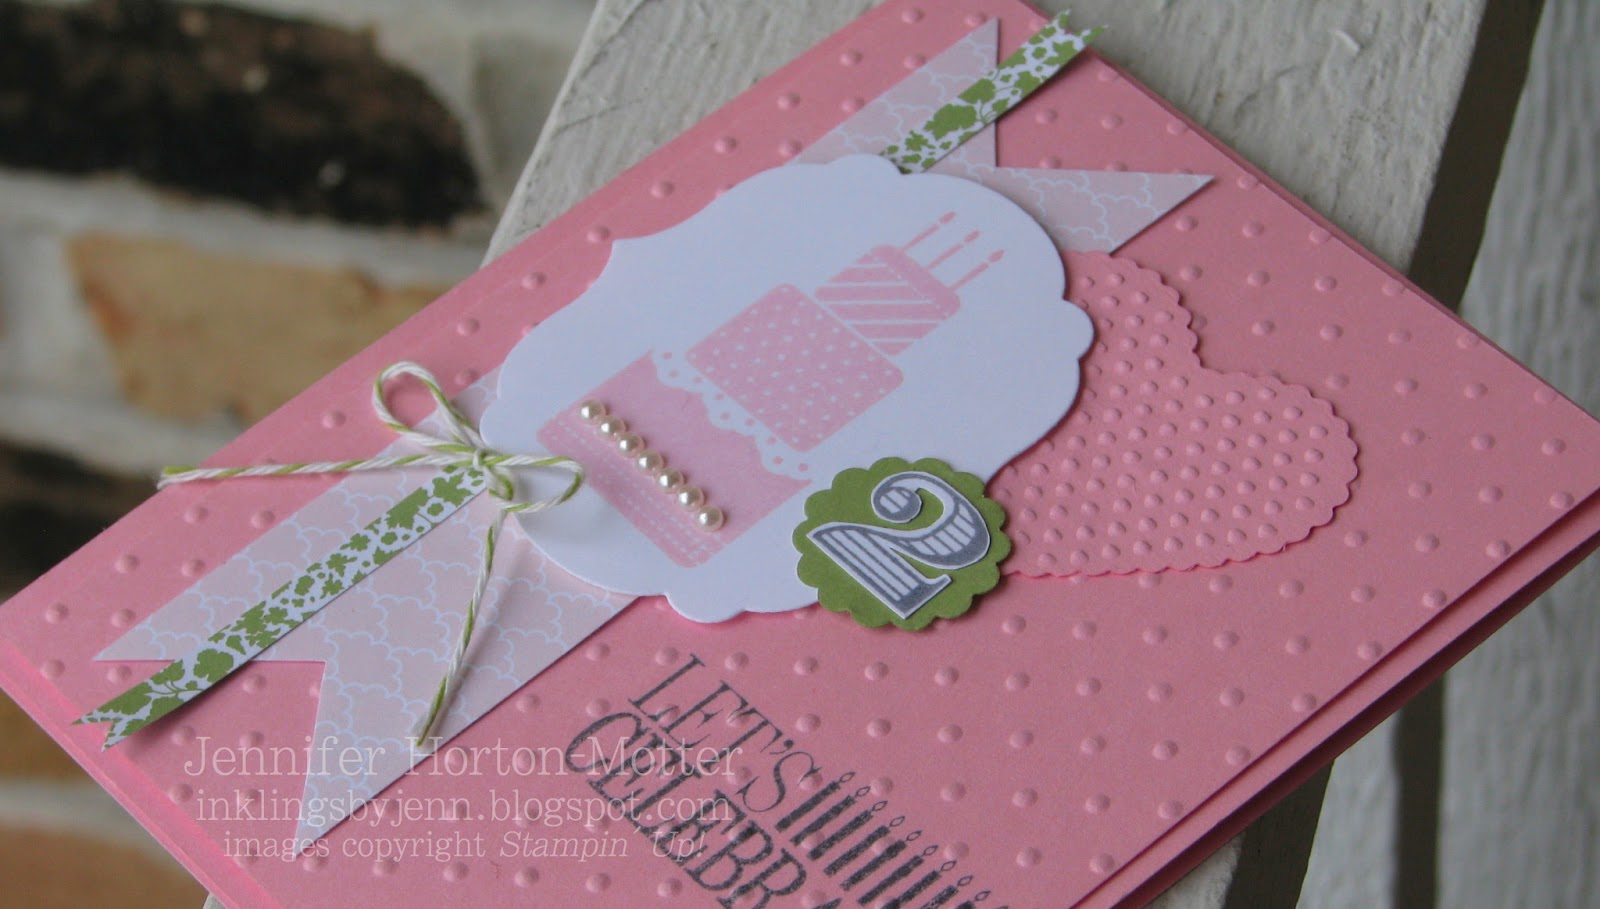
I started with a Crumb Cake card base, and then added a 3-1/2"x4-3/4" layer of Summer Starfruit card stock. My sentiment is from the Itty Bitty Banners stamp set. I "inked" the stamp with a Primrose Petals Marker, and using a Stamp-A-Ma-Jig, I stamped the bottom "happy birthday" onto the Very Vanilla card stock first. Then I repeated the process using a Raspberry Ripple Marker for the top-most "happy birthday." For the middle "happy birthday," I inked the entire stamp using the new firm-foam Summer Starfruit ink pad. Then I die cut the banner using one of the Bitty Banners Framelits.
I die cut my card stock butterflies with the Beautiful Wings Embosslit... sooooo pretty. Can you believe I didn't use any Stampin' Dimensionals on this card???? Crazy!

Before I show you a few more beautiful wings, don't forget that today is the last day to be entered into the BLOG CANDY drawing! Click here for the details.

Since I was enjoying the butterfly theme in my craft room this morning, I thought I would whip up a cute little 3x3 card for a friend. 
I used Calypso Coral card stock, ink, and Baker's Twine for this little cutie. The images are from the My Friend stamp set. I die cut two layers of White Waffle Paper using the Beautiful Butterflies Bigz Die. I'm sad the Waffle Paper retired... you can make some neat things with it. If you don't have any, you can die cut a few layers of tissue paper for a similar look.

And now, for the last "wings" in this post...   Look what I found this weekend: 

This mama robin sure picked a silly spot for a nest! I hope we don't get a downpour before the babies are grown. When it pours really hard, the rain streams over the edge from the upper level and down into the lower level gutter. Plus, this is right outside my door to the backyard... you know, the door my boys and all of their neighborhood friends use 7 million times a day!!! Keep your fingers crossed that we see some of those scrawny little baby birds soon!

Thanks for dropping by today!! Have a fabulous day  :}

Pin It!
Related Posts Plugin for WordPress, Blogger...