Showing posts with label Paper Piercing. Show all posts

Saturday, December 1, 2012

another quilt card, and more fun!

Since I know how much you just loved yesterday's quilt card, I thought I would share another one with you! 
This is one of my Christmas projects for Tuesday's class at the bakery. There are so many things I love about this card. For one thing, I love the greeting (More Merry Messages). It says exactly how I want others to feel - happy! And it's so... British.  :}  Perfect for a Christmas card since the sending of Christmas cards originated in England.
After adhering the four strips of DSP to a 4"x5-1/4" piece of Very Vanilla card stock, I gave the whole layer a "quilted" look - and feel! - by dry embossing it with the Petals-a-Plenty Embossing Folder
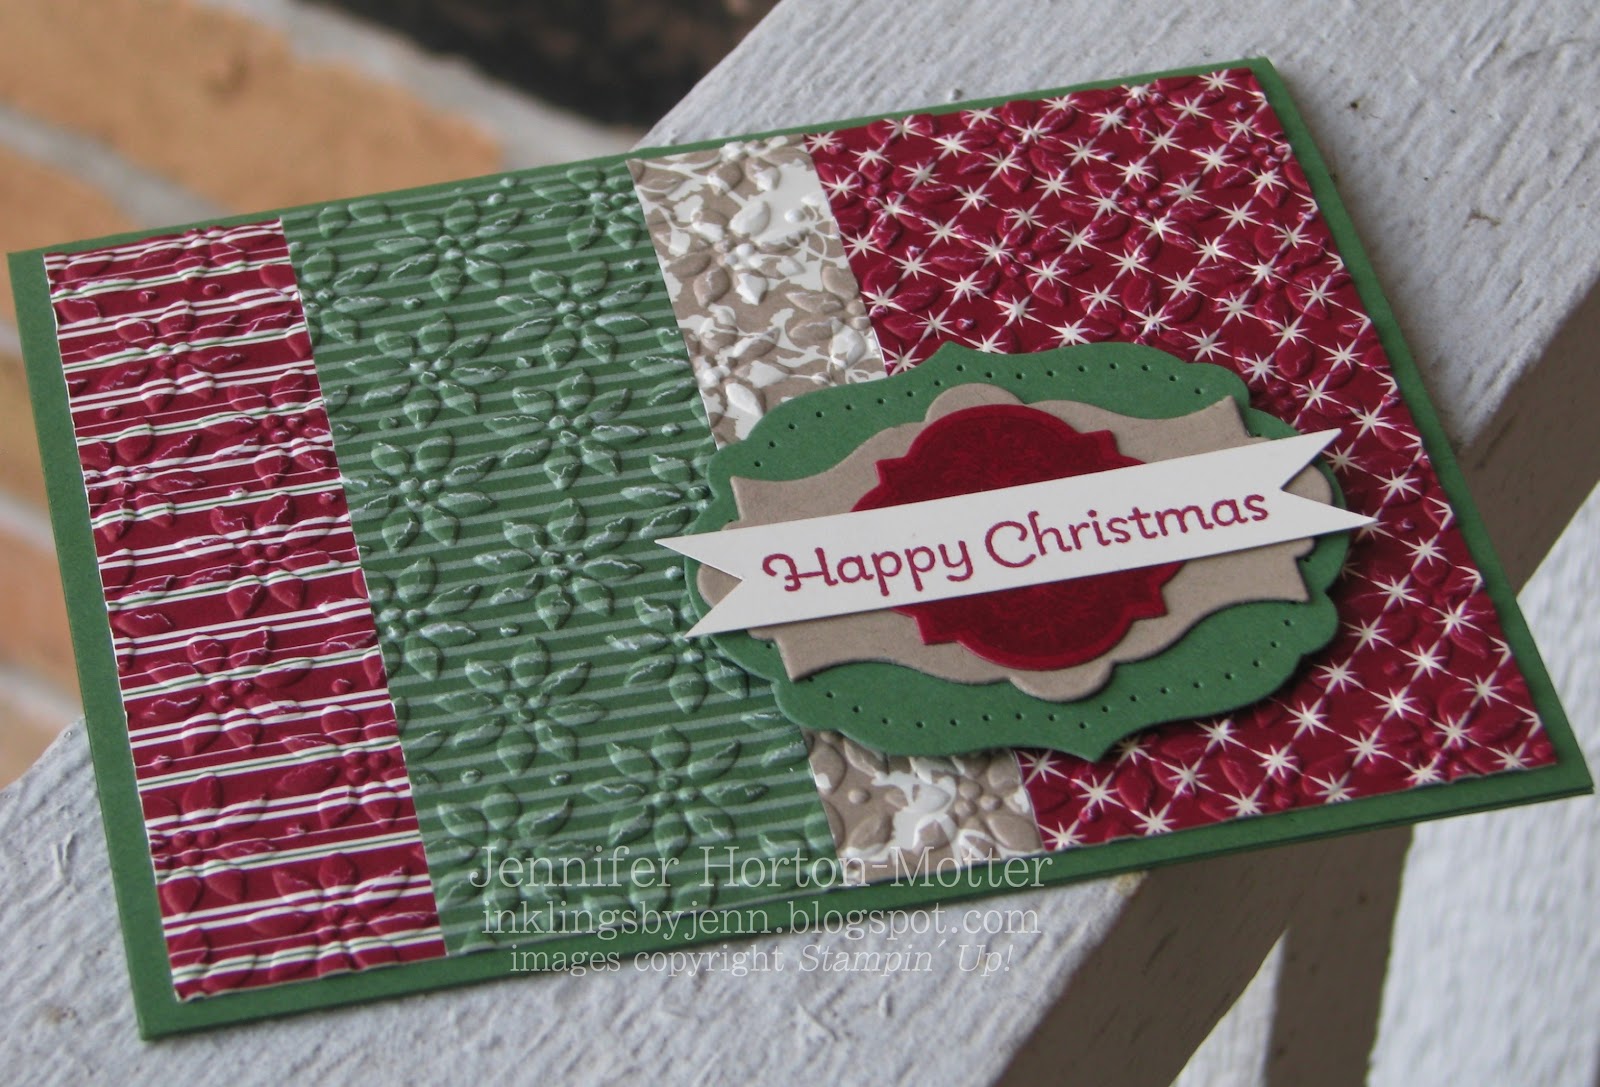
I die-cut a scrap of Garden Green card stock with one of the Framelits in the Labels Collection. Then I used a template from the Festive Paper Piercing Pack to add the pierced details.
Apparently I tried to use all of my Framelits on this card! I used two other sets to complete my layered focal point... one of the Apothecary Accents Framelits for the Crumb Cake layer, and the smallest from the Window Frames Collection (after stamping) for the Cherry Cobbler layer.

I hope all of you have had an enjoyable Saturday so far. I've had a great day with my boys! We woke up to find that "Elfie" had returned to stay with our family for December. 
And, he brought very cool Advent calendars with him - yay!! I'll bet he was planning on writing us a message on the memo board, but had a hard time finding a dry-erase marker  ;) 

We also started a new family tradition this December - a family Advent calendar. Each day, we will spend time together doing the activity stated on that particular day's card. I created all of the cards as a swatchbook using MDS2. (We will be looking at them on my computer until the printed version arrives!) I'm leaving space on some of the cards to add small photos and journaling after we complete the activities. 
 I created a simple swatchbook cover that includes the year... 

 ...and here is the page for December 1st.  Not only will we have fun enjoying the Christmas season together as a family, we will have a mini scrapbook album, too!

I'm looking forward to sharing the rest of our family activities with you. Do you have any special Christmas traditions that you love sharing with your family? 

Pin It!

Saturday, November 24, 2012

Vintage Ornament Christmas Card

My most recent class that I taught at the bakery was a Christmas card class. I wanted the participants to see a variety of styles they could try when stamping their own Christmas cards. So I brought cute, traditional, modern, and vintage cards. I already showed you the cute card, and today I'm sharing my vintage style card. 
I created the background using both DSP and embossed card stock. The Cherry Cobbler DSP layer is from the Be of Good Cheer package, and I used the Fancy Fan Embossing Folder to create that great texture on the Baja Breeze card stock.  
After stamping the ornament in Baja Breeze ink, I used a template in the Festive Paper Piercing Pack to help me add the pierced details. The Very Vanilla layer is adhered with Dimensionals so that those details stand out.
After tying on some Baja Breeze Seam Binding and attaching the focal point layers (more Dimensionals), I spritzed on my shimmer mist, a mixture of Champagne Mist Shimmer Paint in rubbing alcohol.  
 
I even whipped up a simple sketch for my card, so you can add it to your template library. And stay tuned... I'll be posting another card using this same template very soon!!  :} 


Pin It!

Wednesday, November 7, 2012

gotta love the Mojo...

...Mojo Monday that is! Every week they put up a great sketch, and this week's sketch really caught my eye. I played around with several cards, and here's the one I liked best: 
The leaves I used for the circular area on the sketch are a little large, so I omitted the sentiment banner to keep it from looking too "busy." 
To create the leaves, I simply die cut Very Vanilla card stock using the Autumn Accents Bigz die through the Big Shot. Then I inked (More Mustard, Raspberry Ripple, Lucky Limeade) three leaves from the Wonderfall stamp set, and did a little maneuver that's like stamping upside down. All you have to do is ink the stamp, and then lay it on it's back/ block with the rubber facing up. Align your die-cut leaf over the inked stamp, and press down. I like to use a spare block to press evenly.
Can you believe that I didn't use any ribbon or even buttons on this card??? Crazy! But I really liked how the leaves looked so crisp and stood out, so the only "embellishment" I added was some paper piercing around the edge of the Lucky Limeade layer.

Well, I'm off to tackle some more stamping projects... I actually had a dream last night that I was making cards! How silly. Let's see how it influences today's creativity! :}

Pin It!

Monday, October 1, 2012

more Christmas "mojo"

Today is one of those Mondays when I just didn't want to get out of bed. It was chilly this morning, and I'm so tired - a combo that makes me want to snuggle deep into the covers for hours. But, we all know life doesn't work that way  :( 
So, before I even got up, I went online to peek at today's Mojo Monday Sketch. LOVE it! So now I had an "incentive" to get my rear in gear (as if I really need one when I have two kids to get ready for school). I was already planning my card in my head, and anxiously waiting for my stamping time. It took every ounce of restraint not to speed home after my volunteer time at the school!
Ta Da!! Did you ever make a card you love so much, you don't know if you want to even send it to someone? How crazy am I?! Don't answer that. I really will have to make a second card to send, just so I can keep this one :}
It's not just the layout and the images (Ornament Keepsakes) that are really "speaking" to me... I love this color combo I ended up with - Baja Breeze, Cherry Cobbler, Island Indigo, and Very Vanilla. The DSP layer from the Festival of Prints Stack pulls it all together.
These ornaments are so pretty, and easy to use! And having the Holiday Ornaments Framelits to cut them quickly makes me a happy girl. Because the ornament images are the star of the show here, I chose a simple sentiment (More Merry Messages).
I was worried that the card base would be too plain, but I didn't want anything that would be too busy. "Shimmer Mist" to the rescue! Just mix rubbing alcohol with a few drops of Shimmer Paint in a Stampin' Spritzer or travel-sized spray bottle and spritz the mixture onto your card stock. I even added shimmer to the ornaments, because, well, why not??!! It's even prettier in real life  :} 
If you've never tried adding Shimmer Mist to your projects, I encourage you to give it a try - I think you will love the results. If you have any questions, feel free to ask  :}  Happy stamping!!
 

Pin It!

Thursday, September 27, 2012

Christmas "Mojo"

As I've said before, I'm not sure my boys know in which order the Fall and Winter holidays arrive on the calendar. Every year, around the release of the new catalog, my stamping space becomes a flurry of Christmas, Halloween, Thanksgiving, and  Fall- & Winter-themed projects. Pretty soon there will be some Valentine's Day thrown in as well! I love it though... it's nice to spend so much time "celebrating" every holiday!  ;) 
When I saw last week's Mojo Monday sketch, I immediately needed to make a Christmas card. Now, if only I had squeezed in some time last week to make the card! Oh well... better late than never!
stamp set: Petite Pairs
ink: Cherry Cobbler, Garden Green
DSP: Festival of Prints stack, Regals stack 
1" Square punch.   Festive Paper-Piercing Pack.
Window Frames Framelits.   Square Lattice Embossing Folder.
Naturals Designer Button.   Linen Thread. 

I really liked the card Mary Fish made for the sketch - I loved how she used the Window Frames Framelits for the "circle" layers. And the piercing adds the perfect little detail. 
I've been working a lot lately on the Christmas card class I'm teaching as a fundraiser for the Macon County History Museum. The quilters who meet there are interested in attending, so I sorta have "quilts" on the brain  :}  I can't wait to share with you the cards I designed for that class - they're really pretty!
On this card, I used the Flying Geese quilt pattern for my "quilted" focal point. It was a little time consuming, but easy. Using the 1" Square punch, I punched out 4 squares of DSP and 4 squares of Very Vanilla card stock. Then I cut each in half diagonally. First, I adhered a vanilla triangle to the top-left corner of a piece of copy paper (2x4"). Then I added a blue DSP triangle to "complete" the fist "square." The other blue triangle and a vanilla triangle followed, which completed the top row of the "quilt." After every piece was adhered to the copy paper, I dry embossed the layer using the Square Lattice Embossing Folder for a quilted fabric appearance. A layer of Early Espresso card stock behind my "quilted" focal point really helps draw attention to this beautiful quilt-card technique! 

Well, happy holidays ;)  Be sure to come back tomorrow for a Halloween project!  

Pin It!

Wednesday, September 26, 2012

a CASEd birthday card

At the beginning of August, I attended the team meeting held by my upline's upline's upline... How's that for 1 big happy stampin' family?!  :}  There are always great projects to make at the meetings, which I love recreating for classes and workshops. First, I'll share the card we made at the meeting: 
Super cute! And I know exactly who I'm sending this to :} 
Framelits: Labels Collection, Apothecary Accents, Bitty Banners, Window Frames 

Since I liked the card so much, I thought it would be perfect for a birthday card in my stamping class at Wildflour Bakery... so I CASEd it (CASE = copy and share everything). 
For the card base I used Summer Starfruit card stock, and I chose the Patio Party DSP for my paper strips. I also decided to adhere the strips a little lower on the card front.
After stamping the birthday sentiment (from Itty Bitty Banners) in Summer Starfruit ink, I used a Bitty Banners Framelit to cut it out. It's then layered atop Primrose Petals (Large Oval punch), Midnight Muse (Apothecary Accents Framelit), and Summer Starfruit (Labels Framelit) card stock. The piercing around the edge (Festive Paper-Piercing Pack) of the Summer Starfruit layer adds fabulous detail! 

Just curious... which one of your projects was your favorite CASE? Feel free to share by leaving me a comment. 
And in the spirit of sharing ideas, I'd absolutely love it if you would "share" this easy card idea by using one of the little buttons below (Pin, Like, Tweet, Share). Thanks! And have a wonderful day!  :}

Pin It!
Related Posts Plugin for WordPress, Blogger...