Showing posts with label Cherry Cobbler. Show all posts

Sunday, April 28, 2013

saying farewell to favorites

While I do get super excited when a new Stampin' Up! catalog is about to start, sometimes it's hard to say goodbye to some of my favorite retiring products. The Build a Blossom stamp set and Blossom Petals punch are two coordinating goodies I'm having trouble letting go of. They will most likely make their way into my "vault."  :} 
I like how you can make a special, elegant flower that's sure to cheer anyone up! The stamp set has both flower and leaf images that fit perfectly in the punch. 
When assembling the flower, I like to punch out a scrap circle to have a base for adhering the petals. 
One of my favorite flowers to make with these goodies is a poinsettia. It looks nice on cards, scrapbook pages, and gifts!

And buried in my computer files was a video tutorial I made a while ago showing you how easy this is to make! 
Don't you just want to make some right now!!  ;)  I love how amazing the flowers turn out. Make a few for your friends and they will think you are the craftiest person they ever met.  :}  
Be to to shop for all of your favorite retiring goodies before they are all gone!

Pin It!

Friday, March 15, 2013

quilting... my way :}

If only I could sew (sigh). I've tried, many times. And still, I can barely sew on a button, and it looks terrible when I'm finished! Taking some sewing classes/ lessons is definitely on my "to do" list... just as soon as I get some free time - ha! Anywho, I get a bit of a "fabric fix" by making quilt cards. Here's one I made for a swap last month-  
Two blocks of paper (Tea for Two DSP) instead of fabric have a quilted look and feel, and it's really easy to do! I adhered the DSP to a Lucky Limeade card stock layer, and dry embossed them in the Square Lattice Embossing Folder.
After adhering the "quilted" layer, I tied on the grosgrain ribbon over the "seam." I stamped the greeting (Pretty Petites*) three times in Lucky Limeade, punched them out with the Petite Curly Label* punch, and adhered them with Dimensionals. Easy Peasy! 

*Sale-A-Bration items


Want to see two more examples of quilt cards?  Woohoo!!  :} 
card stock: Cherry Cobbler, Crumb Cake, Always Artichoke, Very Vanilla


card stock: Cherry Cobbler, Lucky Limeade, Very Vanilla
DSP: Festival of Prints Stack
punch: Jewelry Tag

Pin It!

Saturday, December 1, 2012

another quilt card, and more fun!

Since I know how much you just loved yesterday's quilt card, I thought I would share another one with you! 
This is one of my Christmas projects for Tuesday's class at the bakery. There are so many things I love about this card. For one thing, I love the greeting (More Merry Messages). It says exactly how I want others to feel - happy! And it's so... British.  :}  Perfect for a Christmas card since the sending of Christmas cards originated in England.
After adhering the four strips of DSP to a 4"x5-1/4" piece of Very Vanilla card stock, I gave the whole layer a "quilted" look - and feel! - by dry embossing it with the Petals-a-Plenty Embossing Folder
I die-cut a scrap of Garden Green card stock with one of the Framelits in the Labels Collection. Then I used a template from the Festive Paper Piercing Pack to add the pierced details.
Apparently I tried to use all of my Framelits on this card! I used two other sets to complete my layered focal point... one of the Apothecary Accents Framelits for the Crumb Cake layer, and the smallest from the Window Frames Collection (after stamping) for the Cherry Cobbler layer.

I hope all of you have had an enjoyable Saturday so far. I've had a great day with my boys! We woke up to find that "Elfie" had returned to stay with our family for December. 
And, he brought very cool Advent calendars with him - yay!! I'll bet he was planning on writing us a message on the memo board, but had a hard time finding a dry-erase marker  ;) 

We also started a new family tradition this December - a family Advent calendar. Each day, we will spend time together doing the activity stated on that particular day's card. I created all of the cards as a swatchbook using MDS2. (We will be looking at them on my computer until the printed version arrives!) I'm leaving space on some of the cards to add small photos and journaling after we complete the activities. 
 I created a simple swatchbook cover that includes the year... 

 ...and here is the page for December 1st.  Not only will we have fun enjoying the Christmas season together as a family, we will have a mini scrapbook album, too!

I'm looking forward to sharing the rest of our family activities with you. Do you have any special Christmas traditions that you love sharing with your family? 

Pin It!

Friday, November 30, 2012

Season's Greetings

Happy Friday!!!! Boy, am I happy to see the weekend! We had a busy schedule this week, and I think it felt even more crazy since I have this darn cold. I am feeling better, so hopefully I will be able to enjoy some "down time." 
I like to spend my free time stamping and digi-scrapping. While I have many friends who enjoy these hobbies as well, I know several others who enjoy quilting. Today's project, a "quilt card," brings them together. 
Isn't that just neat??! I know it's a star pattern, but I don't know which one. Quilters: feel free to leave a comment and clue me in. The best part, is that it's easy to create. I started with a Baja Breeze card base and added a 1-1/2" wide strip of Snow Festival DSP. I love how all of Stampin' Up!'s Designer Series Paper coordinates within each package. It makes a project like this simple, since I don't have to hunt for matching papers! My greeting (More Merry Messages) is stamped in Baja Breeze ink.
The star-quilt design is built on a 3" square of printer paper, and matted with a 3-1/4" square of Gumball Green card stock. 
To create this star pattern, choose three coordinating papers. 
Punch out five 1" squares from "print A" (snowflakes). Set four aside; cut one into four triangles.  
Punch out two 1" squares from "print B" (stars). Cut in half, diagonally. 
Punch out one 1" square from "print C" (flowers); cut it into four triangles.
Pick a corner, and adhere the first square (print A). Adhere the two adjacent triangles. Continue to adhere adjacent triangles until you reach the remaining corner squares.
*** note: The center square is empty, since I knew I would be stamping and punching out the ornament.  
***TIP: I find it easier to use a liquid adhesive on a project like this. It gives me a second to scoot the paper pieces together for a perfect fit.  :} 
 
So what do you think... something you would try? I'd love to hear your thoughts. Have a wonderful weekend!!  :}

Pin It!

Tuesday, November 27, 2012

Lovely As a Christmas Tree

I'll bet you have a few "oldies but goodies" in your stamp stash. You know, the ones that are just so perfect... too good to ever part with. For me, Lovely As A Tree is that stamp set. It's a classic! And that's why it works so well for a traditional Christmas card. 
Remember this template from the vintage Christmas card? It's such an easy card layout that we used it on two cards in my class at the bakery
For the background, I used a layer of Cherry Cobbler Core'dinations card stock. It adds just a hint of texture to my card. I chose not to add another layer in the background, allowing more of the Garden Green card base to show. 
The pine tree is stamped in Garden Green ink onto a 2"x4" layer of Whisper White card stock. My greeting (Petite Pairs) is also stamped in Garden Green. The 3/8" Taffeta Ribbon is the perfect compliment to this card. 

Don't you just love Garden Green and Cherry Cobbler together? I'm using this color combination in another class at the bakery on December 4th. I'd love for my local stamping friends to join me
 
There's a sign up sheet inside Wildflour Artisan Bakery & Cafe (256 West Main St, Decatur). If you're not too full after indulging in some sweets, be sure to check out the new renovations in the Root Cellar! 

Pin It!

Saturday, November 24, 2012

Vintage Ornament Christmas Card

My most recent class that I taught at the bakery was a Christmas card class. I wanted the participants to see a variety of styles they could try when stamping their own Christmas cards. So I brought cute, traditional, modern, and vintage cards. I already showed you the cute card, and today I'm sharing my vintage style card. 
I created the background using both DSP and embossed card stock. The Cherry Cobbler DSP layer is from the Be of Good Cheer package, and I used the Fancy Fan Embossing Folder to create that great texture on the Baja Breeze card stock.  
After stamping the ornament in Baja Breeze ink, I used a template in the Festive Paper Piercing Pack to help me add the pierced details. The Very Vanilla layer is adhered with Dimensionals so that those details stand out.
After tying on some Baja Breeze Seam Binding and attaching the focal point layers (more Dimensionals), I spritzed on my shimmer mist, a mixture of Champagne Mist Shimmer Paint in rubbing alcohol.  
 
I even whipped up a simple sketch for my card, so you can add it to your template library. And stay tuned... I'll be posting another card using this same template very soon!!  :} 


Pin It!

Tuesday, November 20, 2012

Lebkuchen anyone?

I love creating Lebkuchen in my stamping space... not so much in my kitchen. What are Lebkuchen?? Gingerbread!  :}   I think they are so stinkin' cute! Why would I reference these little guys in German? Because it's one of the few words I remember in German!! That's right - I can speak German... well a little anyway. Ich kann nur ein bischen erinnern. Seriously, it's depressing how much I've forgotten after 4 years in high school and a minor in German in college. Perhaps it was the "beginning of the end" for me in my last class for my minor - German literature. If you thought Nietzsche was confusing in English, try reading his works auf Deutsch
Anywho... I'm teaching a Christmas card class at the bakery tonight, and well, it's at a bakery!! I had to create a card with baked goods as a focal point, right?! 
Adorable  :}  And easy, too. I took a 3" wide strip of Gumball Green Core'dinations card stock, and just tore along the top and bottom edges. Over that I layered a 2" wide strip of Snow Festival DSP. 
My Lebkuchen cuties are stamped (Scentsational Season stamp set) in Soft Suede ink onto the same color card stock and die cut (Holiday Collection Framelits) through the Big Shot. After adhering them to the card with Dimensionals, I added Cherry Cobbler Dazzling Details to create the look of candy buttons. The sentiment (More Merry Messages) is also stamped in Soft Suede ink.

This card's too cute to not give you the sketch to go with it! It's one of my most favorite, easy-to-use card sketches. 

Ich wünsche deiner Familie ein gesegnetes Weihnachtsfest! 

Pin It!

Monday, November 19, 2012

Christmas in the heart

I'm feeling a tad guilty posting Christmas cards before Thanksgiving, especially since I have a few opinions on how early the stores start pushing Christmas. BUT, I've pretty much mailed/ delivered all my Fall and Thanksgiving cards for the year, and I've started working on Christmas cards - a little here, a little there. 
I found another neat blog that posts card sketches, and the current sketch challenge - and by current I of course mean that I am posting this at the last minute ;) - made me think of one of the "single" stamps in the Holiday catalog - Heart of Christmas.
I stamped a simple background in Always Artichoke ink (same color as the card stock) using two of the snowflake stamps from the Snowflake Soiree stamp set
The sentiment is used as the focal point on this card. I stamped it in Always Artichoke ink - once onto the Lucky Limeade Layer, and then again onto Whisper White which I trimmed after stamping. 
Two punched hearts (Small Heart punch, and the tiny heart in the Owl Builder punch) and some Cherry Cobbler Baker's Twine are all the embellishments this card needs. 

So, just curious... when do you start making your Christmas cards? Are you an early bird or a procrastinator like me?  :}
If you still have some stamping to do, be sure to check out the amazing deals in my Online Store. There are some cute Christmas stamp sets at GREAT prices!!


Pin It!

Friday, November 16, 2012

a simple card sketch - four ways!

Sometimes I like to give the creative side of my brain a little kick... either to get things started or to get my creativity to move in a different direction. I like to read paper crafting magazines, look through the photo gallery in Stampin' Up!'s online forum for demonstrators, and browse blogs. Earlier this week, a card sketch on the Clean & Simple blog caught my eye. I liked it so much, that I made quite a variety of projects using the same sketch. Today I'm sharing three cards and a  gift tag, all inspired by the sketch.   :} 


stamp set: Curly Cute          Embossing Folder: Lacy Brocade

stamp sets: Merry Minis, Tiny Tags 

Creating the scalloped-edge rectangle was super easy! Using the Scallop Squares Duo Bigz Die, I simply die-cut two of each square. For the card fronts, I adhered the larger squares together with five scallops overlapping. For the tag, the smaller squares are adhered together with three scallops overlapping. 
Speaking of die-cutting, have you ever wished you could see all of Stampin' Up!'s products for the Big Shot in one place??? Your wish has been granted!  :}  

Don't have the Big Shot (yet) but want to create those beautiful embossed textures (like on the thank-you card) with the Embossing Folders??? Another wish granted!! The Texture Boutique Embossing Machine is here! 

whew... That turned out to be quite a long post! Thanks for sticking around to the end.  Now go stamp!!  ;}


Pin It!

Monday, November 12, 2012

how about a card sketch on this chilly day?

Oh my goodness!! It's 32º outside right now!! Quite a change from playing outside with the kids yesterday... BRRRRR! Well, if it's going to be this cold outside, I might as well post a Christmas card! 
To "dress up" the Crumb Cake layer, I added two score lines - easy peasy! The sentiment (Wacky Wishes hostess set) is stamped in Crumb Cake ink. 
I stamped the ornament images (Ornament Keepsakes stamp set) in Crumb Cake, Garden Green, and Cherry Cobbler ink, and then die cut them with one of the Holiday Ornaments Framelits.

Don't you just love making quick, simple Christmas cards?! This layout is a "go to" for me when I want a clean design that I can put together in minutes. And because I love you all, here's the card sketch... 
Don't forget to "Pin It" to save for later! And stay tuned later this week... I'll be sharing a special card using this same template. Have a fabulous Monday!!  ;


Pin It!

Friday, October 26, 2012

gluten-free gravy, class snack, and more...

Ok yes, a strange title for a blog post. But I've been thinking about something lately... 
Every single day someone says to me "I'm not creative." Sometimes several people in a day tell me this. IT DRIVES ME NUTS! Since there are rules against me flicking them on the forehead and shouting "YES YOU ARE!," I will resort to rambling about it here... lucky you  :} 
Stop and think for a minute - not that hard, don't hurt yourself!  ;)  We are all creative, we just don't really pay much attention to it. 
When a baby gets fussy, we find creative ways to entertain the baby.
When dinnertime gets boring, you create new recipes. 
When it rains and cancels your outdoor plans, you create indoor fun for your kids, like building a pillow fort or inventing a new game.
When your child informs you that they have a science project due the next morning, well, you get really creative.
When someone in your family has a food allergy, you get creative with your meals and find ways around certain ingredients. My son, Benjamin, is allergic to milk and eggs. We've explored lots of recipes to find creative ways to make yummy treats - some work, some don't.
When you eat a low-carb diet (no comments unless you want to congratulate me on losing 40 pounds so far), and you hardly ever eat anything made with flour, you have to be creative, or you'll go crazy. Now, I can make beef gravy from scratch that's so good, you pretty much want a little bit of meat and potato to go with your bowl of gravy. But, since that's a no-no for me, I went on a mission to find something that resembles gravy to go with my always yummy chuck roast. Success! You'll find the recipe at the end of this post.
When your child needs to bring a snack for class, you get creative to find something that's both healthy and appealing. Maybe you "google it" or search Pinterest for ideas. 

My point is, that we all have the ability to be creative. We watch and learn from others, we look at common objects in new ways, we experiment, or we use research to help us. If something doesn't work, we toss it and start over.
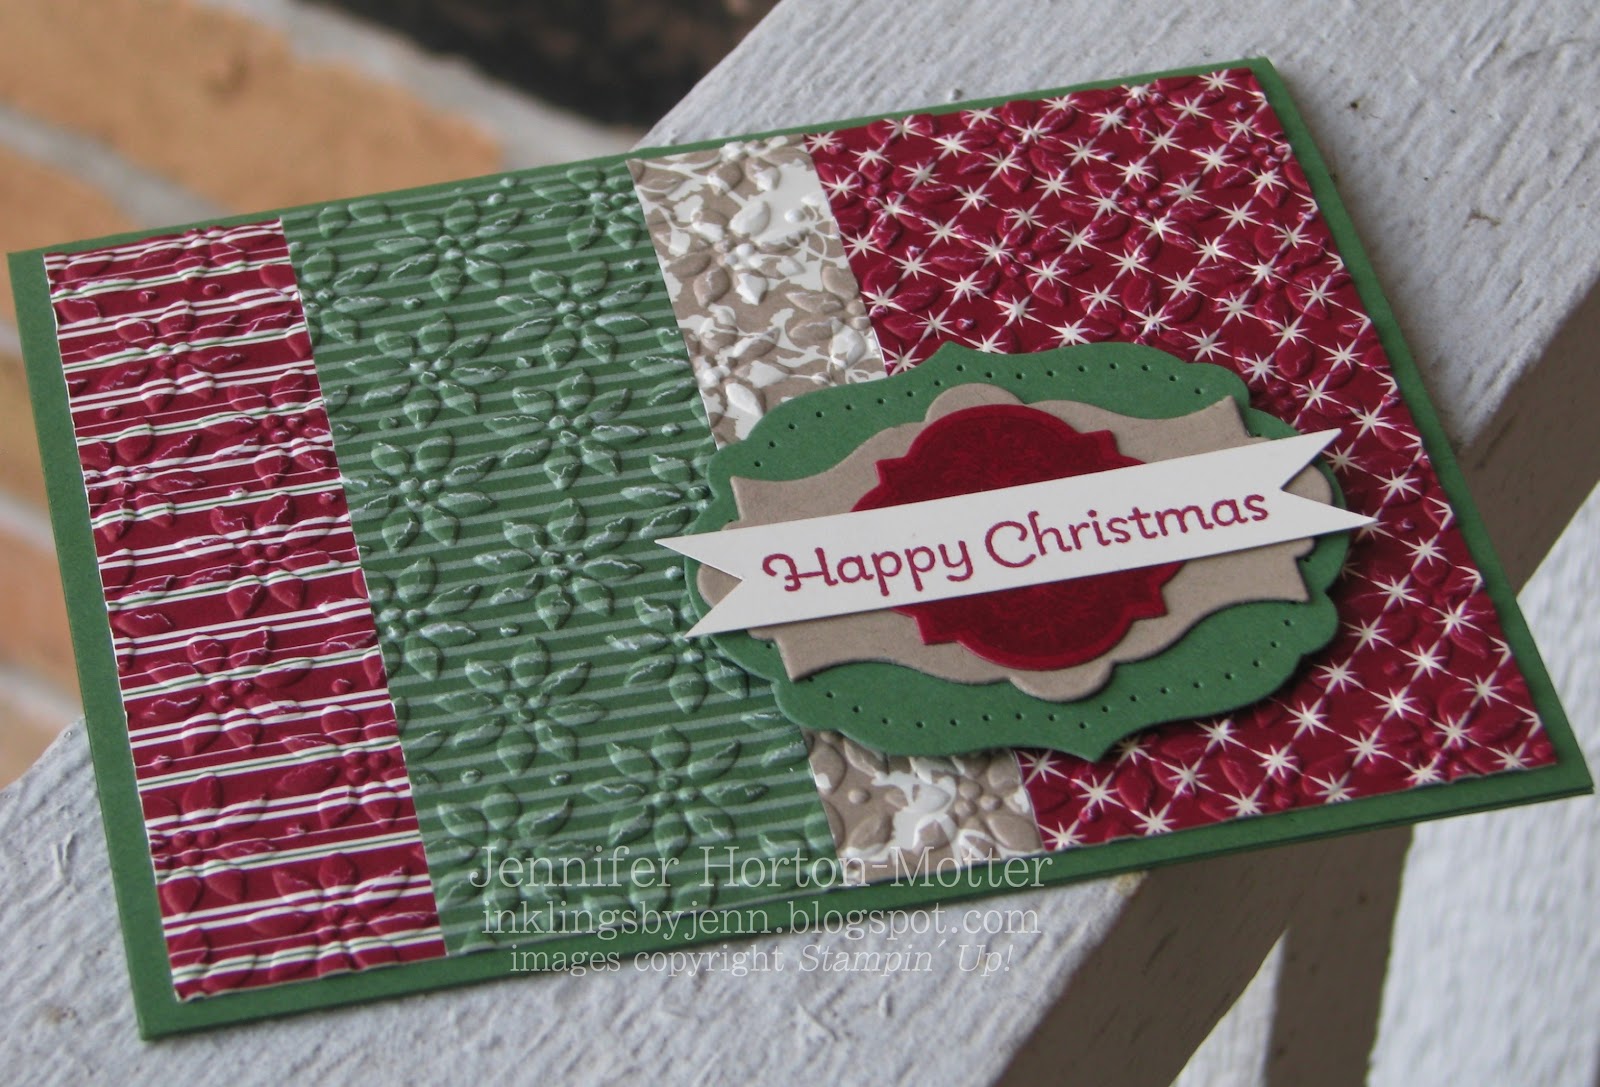
The same is true in paper-crafting. You don't have to be Van Gogh to make a card. Anyone can cut a sheet of card stock in half and start putting "stuff" on it. Take this simple Christmas card for example: 
Choose colors you like, or use traditional combinations (like red and green for Christmas). If you don't know where things should go, do a little research for card sketches and templates, or ask someone to show you. I happen to know a few people who can help  ;)

I guess my whole point in this really long post, is that the next time someone compliments you on your creativity, invite them to come "be creative" with you, and if they say no, flick 'em on the forehead!  ;) 


Aaron's peaches for snack-time today. Thank you Pinterest for the idea! 


Um, yeah... I didn't get a photo of the gravy. We were sooo ready to eat, that I forgot to take a pic! But I do have the recipe for you. First, I sauteed onions in butter and oil, and then seasoned and seared the roast. Next, I added some water and cooked for about 3 hours. 
 *********************

After removing your roast from the oven, pull out your meat and veggies; set aside. With your pot on the stovetop, bring that beefy water to a boil. If you want a stronger beef flavor, you can add 1/2 tsp of Beef Soup Base, but read the label - I know mine has wheat gluten in it. Add beef broth to the pot to make the desired amount of gravy you want. Return to a boil for about 5 minutes so it will reduce out more water. Then, whisk in some Xanthan Gum about 1/2 tsp at a time - this stuff works pretty quickly, and you can always add more. Whisk continuously until it starts to thicken; it will thicken a tad bit more as it cools. 
That's it! If you give it a try, leave me a comment and let me know what you think  :} 

Pin It!

Thursday, October 25, 2012

Stink, Stank, Stunk!

I don't usually create punch art projects... I leave those to the experts. But I was playing in my stamping space when this idea came to me, and it just had to be done
This Christmas card is for my hubby. He can be quite the Grinch at Christmas time, which I don't get. I mean, what exactly does he have to get stressed about? Buying all the gifts? Wrapping them? Preparing Holiday meals? Decorating? I do all that! And I still walk around with a big old goofy smile on my face while singing Christmas songs. I think he'll be getting this card the day after Thanksgiving with a friendly note inside ;)
Hilarious, right???!  And I'll bet you're still singing the song... I am  :) 
To make the card base (Grinch's face) I folded 8-1/2" x 4-1/4" Lucky Limeade card stock in half. I die cut it in the Big Shot using the Top Note Bigz Die, making sure that the folded edge did not get cut. 
Here's what I used to make the rest of Mr. Grinch...  

HAT
Cherry Cobbler card stock & Perfect Pennants Bigz Die

EYEBROWS
Basic Black card stock "nipped" with the teeny postage-stamp punch

EYES
So Saffron card stock & 1" Circle Punch 
Soft Suede card stock & largest circles in the Owl Builder punch 

Nose

After adhering all the pieces to the front, I used a Basic Black Marker to draw the mouth. That's it!
Just curious... do you have any Grinches in your family? What do you do to keep them happy... lots of eggnog and wine???  :) 


Pin It!
Related Posts Plugin for WordPress, Blogger...